

How To Set Git Credentials In Vs Code
Home / Version Controlling with Git in Visual Studio Lawmaking and GitHub
Overview
Git is a distributed version control system. Git repositories can live locally (such as on a developer'due south machine). Each developer has a copy of the source repository on their dev motorcar. Developers can commit each set of changes on their dev machine and perform version control operations such as history and compare without a network connection.
In this lab, you will learn how to clone an existing Git repository from GitHub. In add-on, you will learn about Git branching and merging support. You will use Visual Studio Lawmaking, but the same processes utilise for using whatever Git-compatible client with GitHub.
Prerequisites
-
Visual Studio Lawmaking with the C# extension installed.
-
Git for Windows 2.21.0 or later.
Practise 1: Configuring the lab environment
Task 1: Configuring Visual Studio Code
-
Open up Visual Studio Code. In this chore, you will configure a Git credential helper to securely store the Git credentials used to communicate with GitHub. If you have already configured a credential helper and Git identity, you can skip to the next task.
-
From the master carte du jour, select **Final New Terminal** to open a last window. -
Execute the control below to configure a credential helper.
git config --global credential.helper wincred -
The commands beneath will configure your user name and email for Git commits. Replace the parameters with your preferred user name and e-mail and execute them.
git config --global user.name "John Doe" git config --global user.email johndoe@example.comChore ii: Forking an existing repository
-
In a browser tab, navigate to the GitHub projection at https://github.com/Microsoft/PartsUnlimitedE2E.
-
Click Fork. This will re-create the entire repository into the account you specify so that you lot can work on it without impacting the original repo.

- Select the GitHub account to fork into. The fork should complete speedily.
Task 3: Cloning an existing repository
-
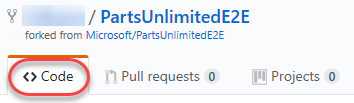
Your GitHub browser tab should now exist open to your forked version of the repo.
-
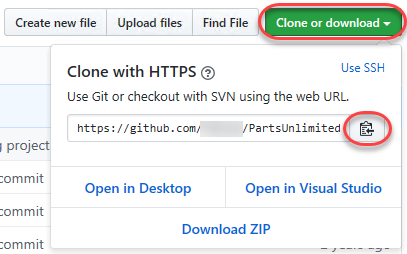
Getting a local copy of a Git repo is called "cloning". Every mainstream development tool supports this and volition exist able to connect to GitHub to pull downward the latest source to work with. From the Clone or download dropdown, click the Copy to clipboard button.
-
Open up an instance of Visual Studio Lawmaking.
-
Press Ctrl+Shift+P to show the Control Palette. The Control Palette provides an piece of cake and convenient way to access a wide diversity of tasks, including those provided past 3rd party extensions.
-
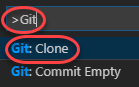
Execute the Git: Clone command. It may help to type "Git" to bring it to the shortlist.
-
Paste in the URL to your repo and press Enter.

-
Select a local path to clone the repo to.
-
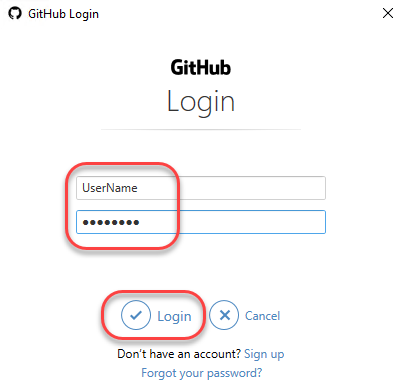
When prompted, log in to your GitHub account.
-
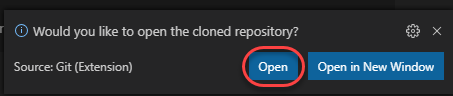
Once the cloning has completed, click Open. You tin ignore any warnings raised virtually opening the projects. The solution may not be in a buildable state, but that's okay since we're going to focus on working with Git and edifice the project itself is non necessary.
Do 2: Saving work with commits
When you make changes to your files, Git volition record the changes in the local repository. You tin can select the changes that you want to commit past staging the changes. Commits are e'er made against your local Git repository, then you don't have to worry about the commit being perfect or ready to share with others. You can make more than commits equally you keep to piece of work, and push the changes to others when they are gear up to be shared.
What's in a commit?
Git commits consists of the post-obit:
-
The file(southward) changed in the commit. Git keeps the contents of all file changes in your repo in the commits. This keeps it fast and allows intelligent merging.
-
A reference to the parent commit(s). Git manages your code history using these references.
-
A bulletin describing a commit. You give this message to Git when you create the commit. It's a good idea to keep this message descriptive, but to the point.
Job 1: Committing changes
-
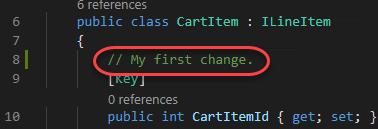
From the Explorer tab, open /PartsUnlimited-aspnet45/src/PartsUnlimitedWebsite/Models/CartItem.cs.

-
Add together a comment to the file. It doesn't really affair what the annotate is since the goal is just to make a change. Press Ctrl+Due south to save the file.
-
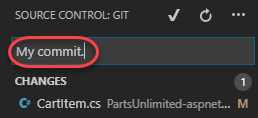
Select the Source Command tab to meet the i modify to the solution.

-
Enter a commit message of "My commit" and printing Ctrl+Enter to commit it locally.
-
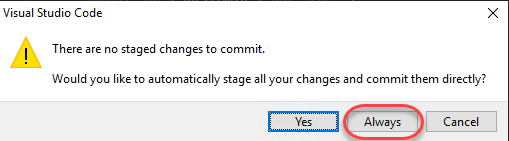
If asked whether you lot would like to automatically stage your changes and commit them directly, click Ever. We will discuss staging later in the lab.
-
Click the Synchronize Changes push to synchronize your changes with the server. Confirm the sync if prompted.

-
If prompted, log in to your GitHub account.
Chore ii: Staging changes
Staging changes allows you lot to selectively add certain files to a commit while passing over the changes made in other files.
-
Render to Visual Studio Code.
-
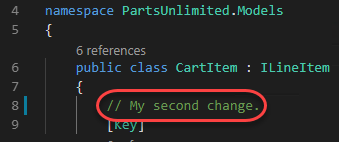
Update the open CartItem.cs class by editing the comment you made earlier and saving the file.
-
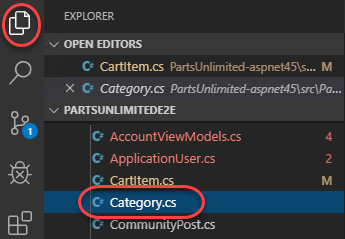
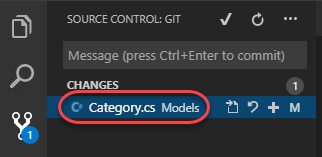
Open Category.cs as well.
-
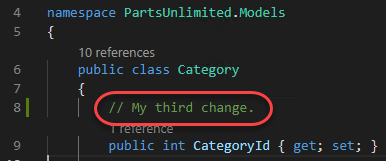
Add a new comment to Category.cs so there will be two files with changes. Salve the file.
-
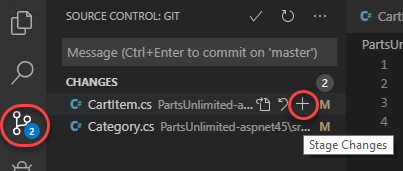
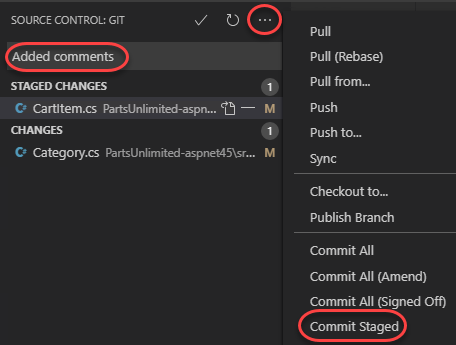
From the Source Control tab, click the Stage Changes button for CartItem.cs.
-
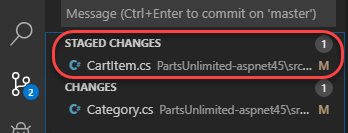
This volition set up CartItem.cs for committing without Category.cs.
-
Enter a comment of "Added comments". From the More than Actions dropdown, select Commit Staged.
-
Click the Synchronize Changes button to synchronize the committed changes with the server. Note that since simply the staged changes were committed, the other changes are still pending locally.

Exercise 3: Reviewing history
Git uses the parent reference information stored in each commit to manage a full history of your evolution. You can easily review this commit history to detect out when file changes were made and determine differences between versions of your lawmaking using the terminal or from one of the many Visual Studio Lawmaking extensions bachelor. Yous tin can also review changes using the GitHub portal.
Git's apply of the Branches and Merges feature works through pull requests, then the commit history of your development doesn't necessarily class a directly, chronological line. When y'all use history to compare versions, think in terms of file changes between 2 commits instead of file changes betwixt 2 points in time. A contempo change to a file in the master branch may have come from a commit created ii weeks ago in a characteristic branch but was only merged yesterday.
Task one: Comparing files
-
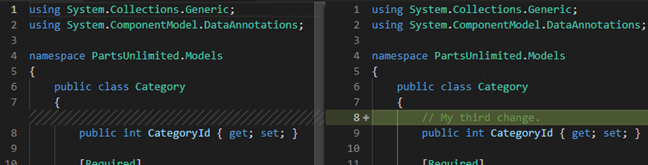
In the Source Control tab, select Category.cs.
-
A comparison view is opened to enable you to hands locate the changes you've made. In this case, information technology'due south just the 1 comment.
-
Return to the GitHub browser tab.
Chore three: Reviewing commits
-
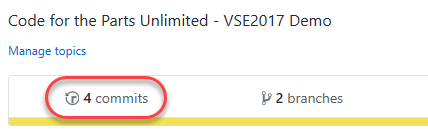
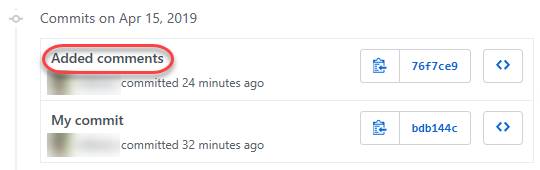
Switch to the GitHub browser tab. Y'all can review the latest commits on GitHub nether the Commits tab.
-
The contempo commits should be right at the tiptop. Click the most recent 1.
-
This view enables yous to review the changes applied by this commit. Click View file.

-
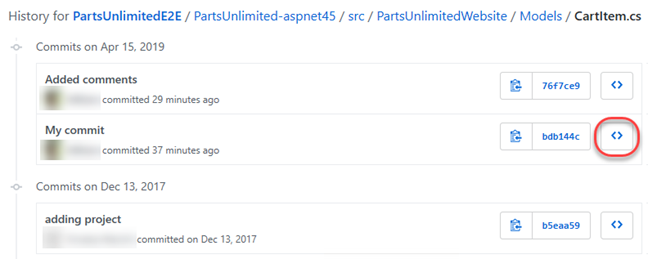
Click History to track the commits made to this file over time.

-
Click the Scan repository at this point in the history push for the second commit. This was the offset commit pushed from this lab.
-
You lot tin can now review the state of the repo at the fourth dimension this commit was pushed. The dropdown at the top provides a convenient style to switch between branches besides.

Exercise four: Working with branches
You lot tin manage the work in your GitHub repo from the Branches tab. You lot tin besides customize the view to track the branches you care most about so you lot can stay on tiptop of changes made past your team.
Committing changes to a branch will non bear upon other branches, and you tin can share branches with others without having to merge the changes into the primary project. You can also create new branches to isolate changes for a feature or a problems fix from your master branch and other piece of work. Since the branches are lightweight, switching betwixt branches is quick and easy. Git does not create multiple copies of your source when working with branches, but rather uses the history information stored in commits to recreate the files on a branch when you beginning working on it. Your Git workflow should create and use branches for managing features and bugfixes. The rest of the Git workflow, such as sharing code and reviewing code with pull requests, all work through branches. Isolating work in branches makes information technology very elementary to change what you are working on past simply changing your current branch.
Task ane: Creating a new branch in your local repository
-
Render to Visual Studio Code.
-
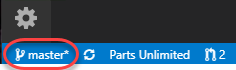
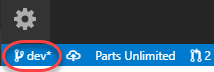
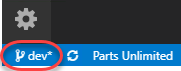
Click the principal branch from the lesser left.
-
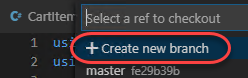
Select Create new branch.
-
Enter the proper noun "dev" for the new branch and printing Enter.

-
If prompted, select master as the reference branch.
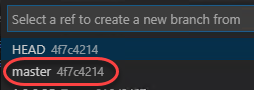
-
You are at present working on that branch.
Chore 2: Working with branches
Git keeps track of which branch you are working on and makes certain that when you lot checkout a co-operative your files lucifer the most recent commit on the co-operative. Branches allow you piece of work with multiple versions of the source code in the aforementioned local Git repository at the same time. Y'all can use Visual Studio Code to publish, bank check out, and delete branches.
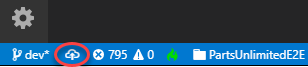
-
Click the Publish changes button next to the branch.
-
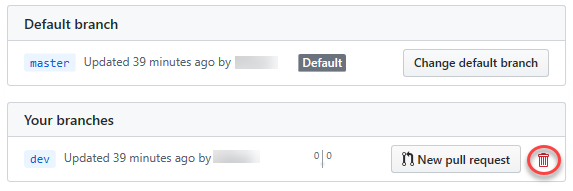
From the GitHub browser tab, select the Branches tab.

-
You should come across the newly pushed dev branch. Click the Delete this branch button to delete it.
-
Return to Visual Studio Lawmaking.
-
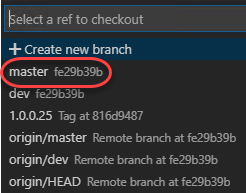
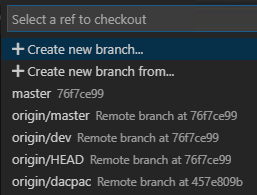
Click the dev co-operative.
-
Notation that there are two dev branches listed. The local (dev) branch is there because information technology's not deleted when the server co-operative is deleted. The server (origin/dev) is there because it hasn't been pruned. Select the chief branch to cheque it out.
-
Printing Ctrl+Shift+P to open the Command Palette.
-
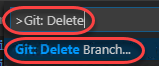
Showtime typing "Git: Delete" and select Git: Delete Branch when it becomes visible.
-
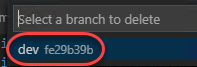
There is only one local branch to delete, so select it.
-
Click the primary branch.

-
Note that the local dev co-operative is gone, but the remote origin/dev is all the same showing.
-
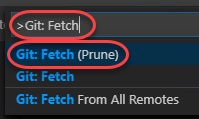
Press Ctrl+Shift+P to open the Command Palette.
-
Get-go typing "Git: Fetch" and select Git: Fetch (Prune) when it becomes visible. This command volition update the origin branches in the local snapshot and delete those that are no longer there.
-
You can check in on exactly what these tasks are doing by selecting the Output window at the bottom of the screen. If this window isn't visible, you tin can restore it with the **View Output** menu. 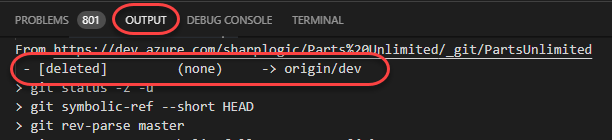
-
Note that if you don't run across the Git logs in the output console, you lot may need to select Git as the source.

-
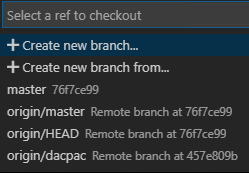
Click the master branch.

-
The origin/dev branch should no longer be in the listing.
Exercise 5: Managing branches from GitHub
In improver to all the functionality bachelor in Visual Studio Code, you tin besides manage your repo branches from the GitHub portal.
Task 1: Creating a new branch
-
Switch to the GitHub browser tab.
-
Render to the Code tab root.
-
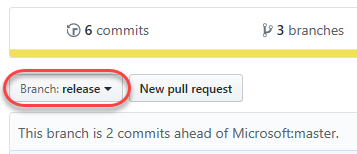
From the branches dropdown, enter a co-operative name of "release". Click Create branch: release. This will create a new branch and switch to it.

-
You lot can confirm that the newly created release branch is selected.
-
Return to Visual Studio Code.
-
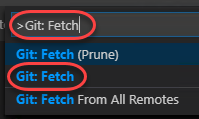
Press Ctrl+Shift+P to open up the Command Palette.
-
Start typing "Git: Fetch" and select Git: Fetch when it becomes visible. This control will update the origin branches in the local snapshot.
-
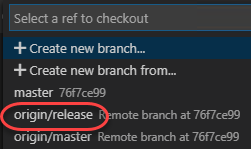
Click the chief branch.

-
Select origin/release. This will create a new local branch called "release" and check information technology out.
Task 2: Deleting a branch
-
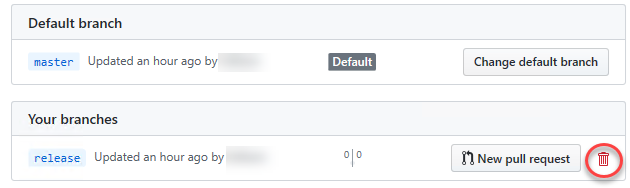
Render to the GitHub browser tab and navigate to the Branches tab.

-
Click the Delete push for the release branch.
-
However, maybe we should keep it around for a little longer. Click Restore to undo the delete.

Task 3: Tagging a release
-
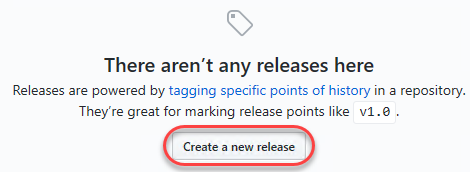
While information technology may non seem similar much, the product team has decided that this version of the site is exactly what'southward needed for v1.1. In order to mark it every bit such, return to the Lawmaking tab and select Releases.

-
Click Create a new release.
-
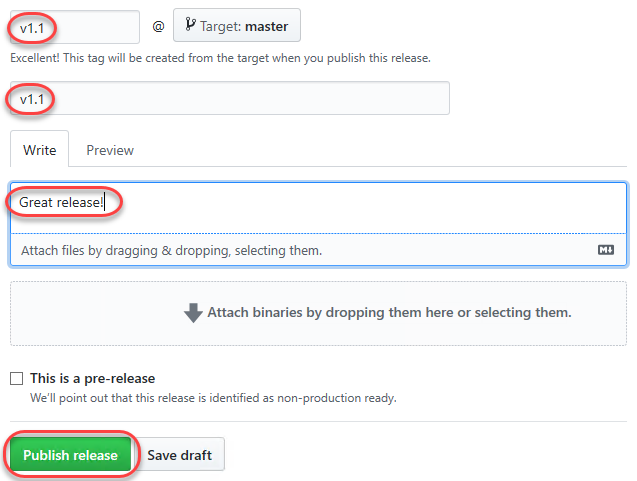
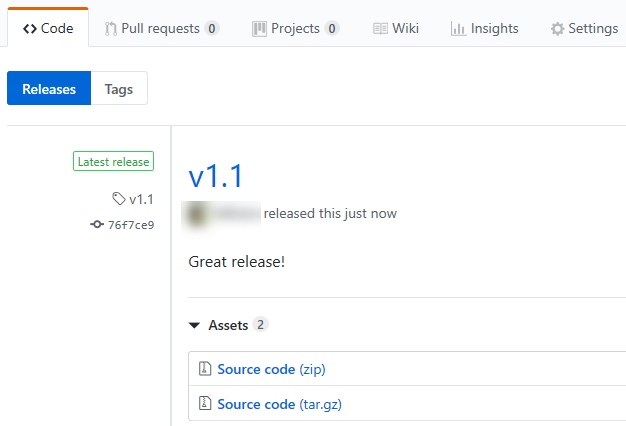
Enter tag and release names of "v1.1" and a Clarification of "Great release!". Click Publish release.
-
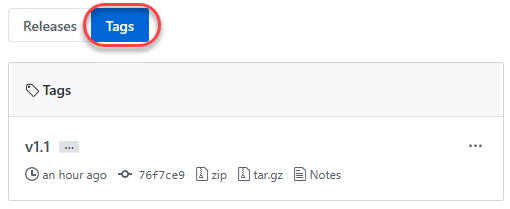
You accept at present tagged the projection at this release. You could tag commits for a variety of reasons, and GitHub offers the flexibility to edit and delete them, equally well equally manage their permissions.
-
Select the Tags option to review tags by name.
Exercise 6: Managing repositories
You lot tin can create Git repos in team projects to manage your project's source code. Each Git repo has its own set of permissions and branches to isolate itself from other piece of work in your project.
Task 1: Creating a new repo
-
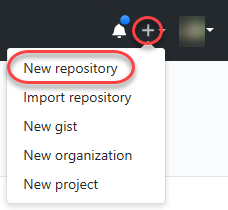
From the New dropdown, select New repository.
-
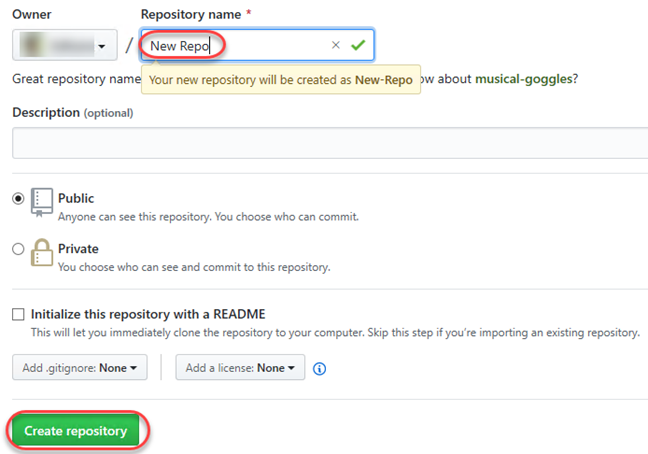
Set the Repository proper noun to "New Repo". Notation that yous also have the option to create a file named README.doc. This would be the default markdown file that is rendered when someone navigates to the repo root in a browser. Additionally, y'all can preconfigure the repo with a .gitignore file. This file specifies which files, based on naming pattern and/or path, to ignore from source control. At that place are multiple templates bachelor that include the mutual patterns and paths to ignore based on the project type you are creating. Click Create repository.
-
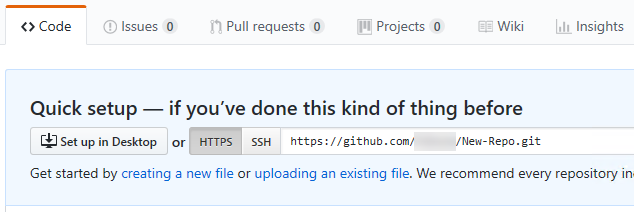
That'southward it. Your repo is set. You now have the ability to clone it with Visual Studio or your tools of choice.
Task ii: Renaming and deleting Git repos
-
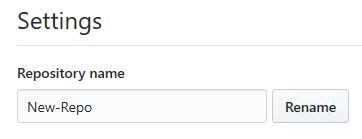
Sometimes you'll have a need to rename or delete a repo, which is simply as piece of cake. Navigate to Settings.

-
You can update the name of the repository here.
-
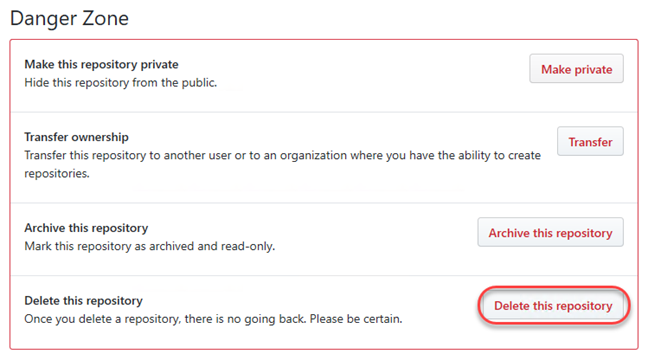
From the Danger Zone section of the settings view, click Delete this repository.
-
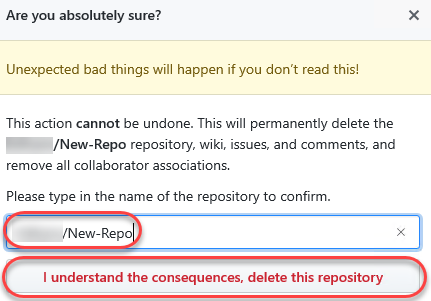
Enter the full repo name and click the option to delete the repository.
Source: https://www.azuredevopslabs.com/labs/azuredevops/github/
0 Response to "How To Set Git Credentials In Vs Code"
Post a Comment